
How to Create an Online Course and Community with Next.js
If you are building with Next.js, you can run your course and your learner community in one place instead of splitting users across different tools.
In this guide, you will learn how to:
- Create your online course in Embedin
- Embed it in a Next.js app
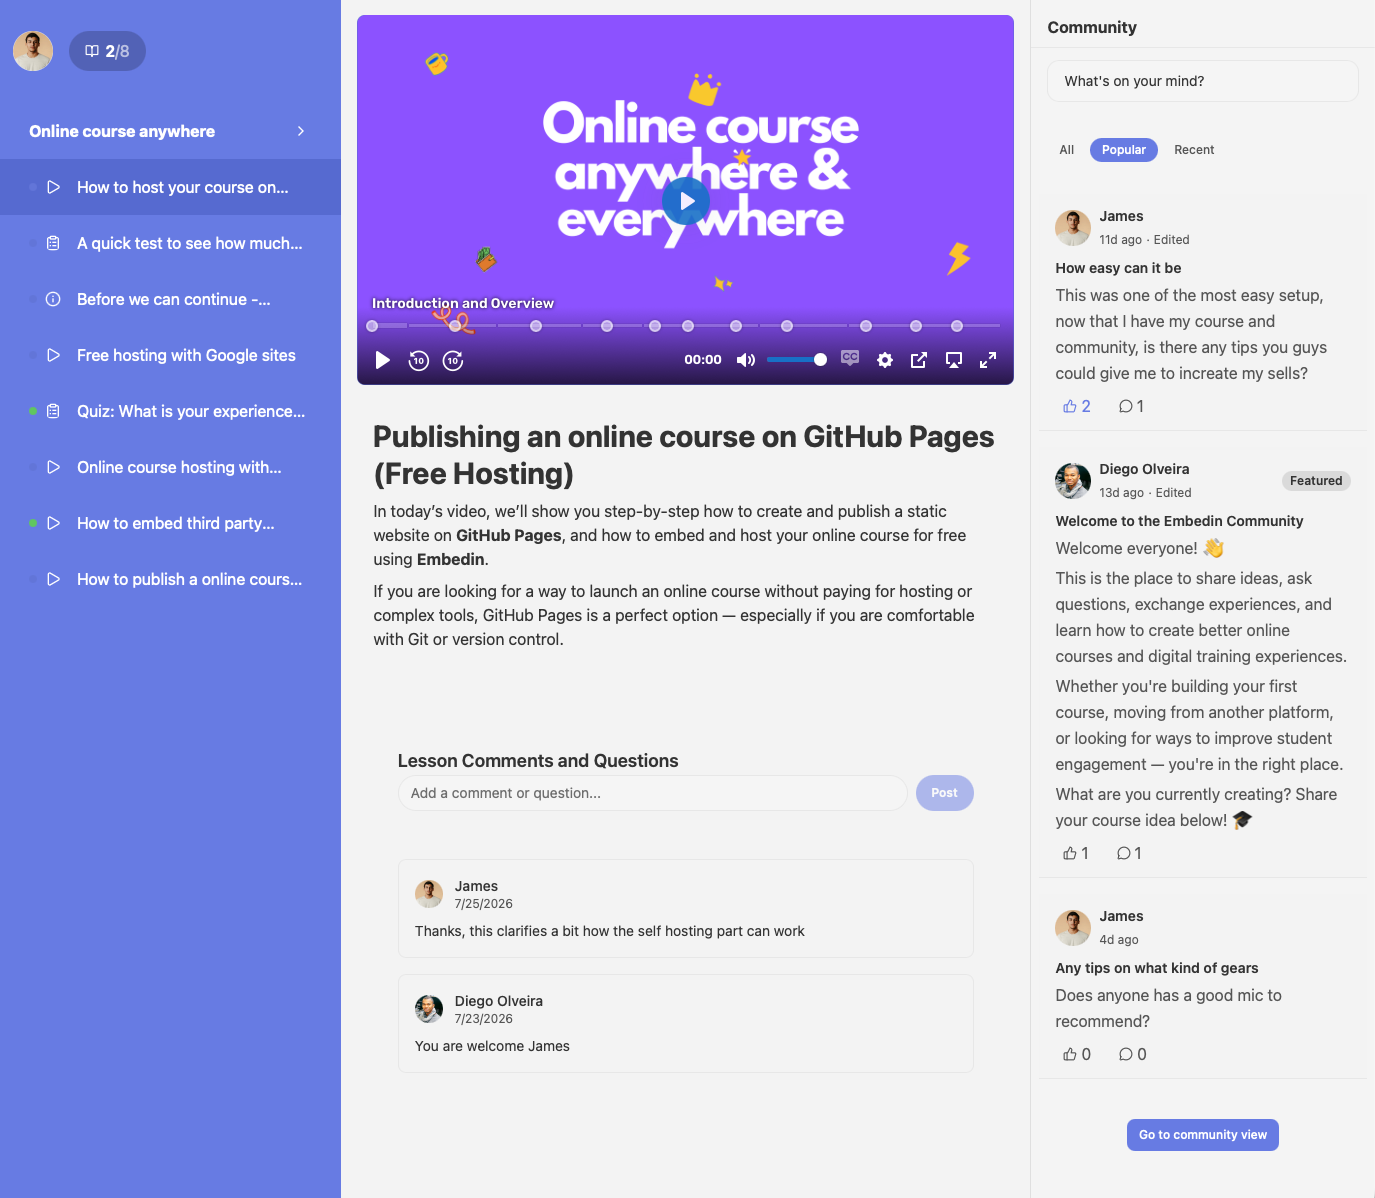
- Enable Community so learners can post and interact
- Launch with a clean structure that is easy to scale
Why Next.js works well for course businesses
Next.js gives you flexibility for both marketing and product experience.
You can use it to:
- Build your public site and sales pages
- Create authenticated member areas
- Add a custom dashboard around your course
- Keep SEO-friendly pages for discoverability
Instead of building video delivery, lesson progression, and community infrastructure from scratch, you can keep Next.js focused on your app experience and use Embedin as the learning layer.
What Embedin handles for you
Embedin covers the core learning platform capabilities:
- Course structure (modules and lessons)
- Video hosting and delivery
- Enrollment and access control
- Embedded course player
- Built-in Community for learner interaction
That means you can ship faster and still keep full control of your frontend in Next.js.
Step 1: Create your course in Embedin
- Sign up or log in to Embedin
- Create a new course
- Add your title, description, and lessons
- Publish when your initial content is ready
- Copy your course ID from course settings
You will use this ID in your Next.js page.
Step 2: Allow your Next.js domain in Embedin
In course settings, add the domains where your course will run.
Typical values:
http://localhost:3000https://yourdomain.com
If the domain is missing, the embed will not load.
Step 3: Create a course page in Next.js
If you are using the App Router, create a client component for the course route.
'use client'

import { useEffect } from 'react'

const COURSE_ID = 'YOUR_COURSE_ID'

export default function CoursePage() {
  useEffect(() => {
    const script = document.createElement('script')
    script.type = 'module'
    script.src = 'https://embed.embedin.com/course.js'
    script.setAttribute('data-courseid', COURSE_ID)
    document.body.appendChild(script)

    return () => {
      document.body.removeChild(script)
    }
  }, [])

  return (
    <main>
      <h1>Academy</h1>
      <div id={COURSE_ID} data-courseid={COURSE_ID} />
    </main>
  )
}
Replace YOUR_COURSE_ID with your actual course ID. You can find it in your course settings in Embedin.
Step 4: Enable Community in your course settings
In Embedin course settings, enable the Community feature.
When enabled, your learners can:
- Create posts
- Comment and reply
- Interact inside the course environment
This keeps conversation close to the lessons, which usually improves completion and retention.
Step 5: Seed community before launch
Do not launch an empty community feed.
Create 3 starter posts:
- Welcome + how to use this space
- Introduce yourself thread
- Weekly wins or progress check-in
This creates immediate social proof and gives new learners a clear first action.
Step 6: Organize your Next.js routes for growth
A simple route structure that works well:
/for marketing pages/academyfor course home/academy/coursefor embedded learning experience/academy/community-guidelinesfor behavior and support rules
This keeps your product clean as your audience grows.
Common mistakes to avoid
Waiting too long to enable community
If community is turned on much later, learners already build habits outside your platform.
Launching with no moderation rule
Set basic guidelines and assign one owner or moderator from day one.
Treating course and community as separate products
The best outcomes happen when lessons and discussion support each other.
Final thought
Next.js gives you control of the frontend. Embedin gives you the course and community infrastructure.
Together, you can launch a complete online learning experience quickly without rebuilding the hard parts.
If you are ready to ship, create your course in Embedin, embed it in your Next.js app, and enable Community from the start.
.png)